Autorize is an open-source automatic authorization and authentication enforcement detection extension for Burp Suite.
It is designed to assist application security engineers and penetration testers in identifying authorization bypasses and authentication weaknesses in web applications—at scale and with minimal manual effort.
Autorize passively monitors traffic generated by a high-privileged user, automatically replays requests using low-privileged or unauthenticated contexts, and analyzes the server responses to determine whether access controls are properly enforced.
The extension is written in Python by Barak Tawily, an application security researcher and practitioner.
- Automatic authorization enforcement testing
- Automatic authentication enforcement testing
- Transparent request modification and replay
- Configurable enforcement detection (content, headers, regex, length)
- Support for:
- Cookie-based authentication
- Authorization headers (e.g., Bearer tokens)
- Seamless integration with:
- Proxy traffic
- Burp Repeater
- Flexible interception filtering (scope, whitelist, blacklist, regex)
- Visual enforcement status indicators for rapid triage
- Detecting IDORs and broken access control issues
- Verifying role separation (admin vs. user)
- Identifying endpoints missing authentication
- Validating backend authorization logic consistency
- Reducing manual authorization testing overhead
Autorize is especially effective during authenticated testing, where traditional crawling and scanning tools fall short.
- Burp Suite (Community or Professional)
- Jython Standalone JAR
-
Download Burp Suite
https://portswigger.net/burp/download.html -
Download Jython Standalone
https://www.jython.org/download.html -
Configure Jython in Burp
- Burp → Extender → Options
- Python Environment → Select File
- Choose the Jython standalone JAR
-
Install Autorize
- Recommended: Install directly from the BApp Store
- Manual installation:
git clone https://github.com/Quitten/Autorize.git
- Burp → Extender → Extensions → Add
- Select
Autorize.py
-
Verify installation
- A new Autorize tab should appear in Burp
-
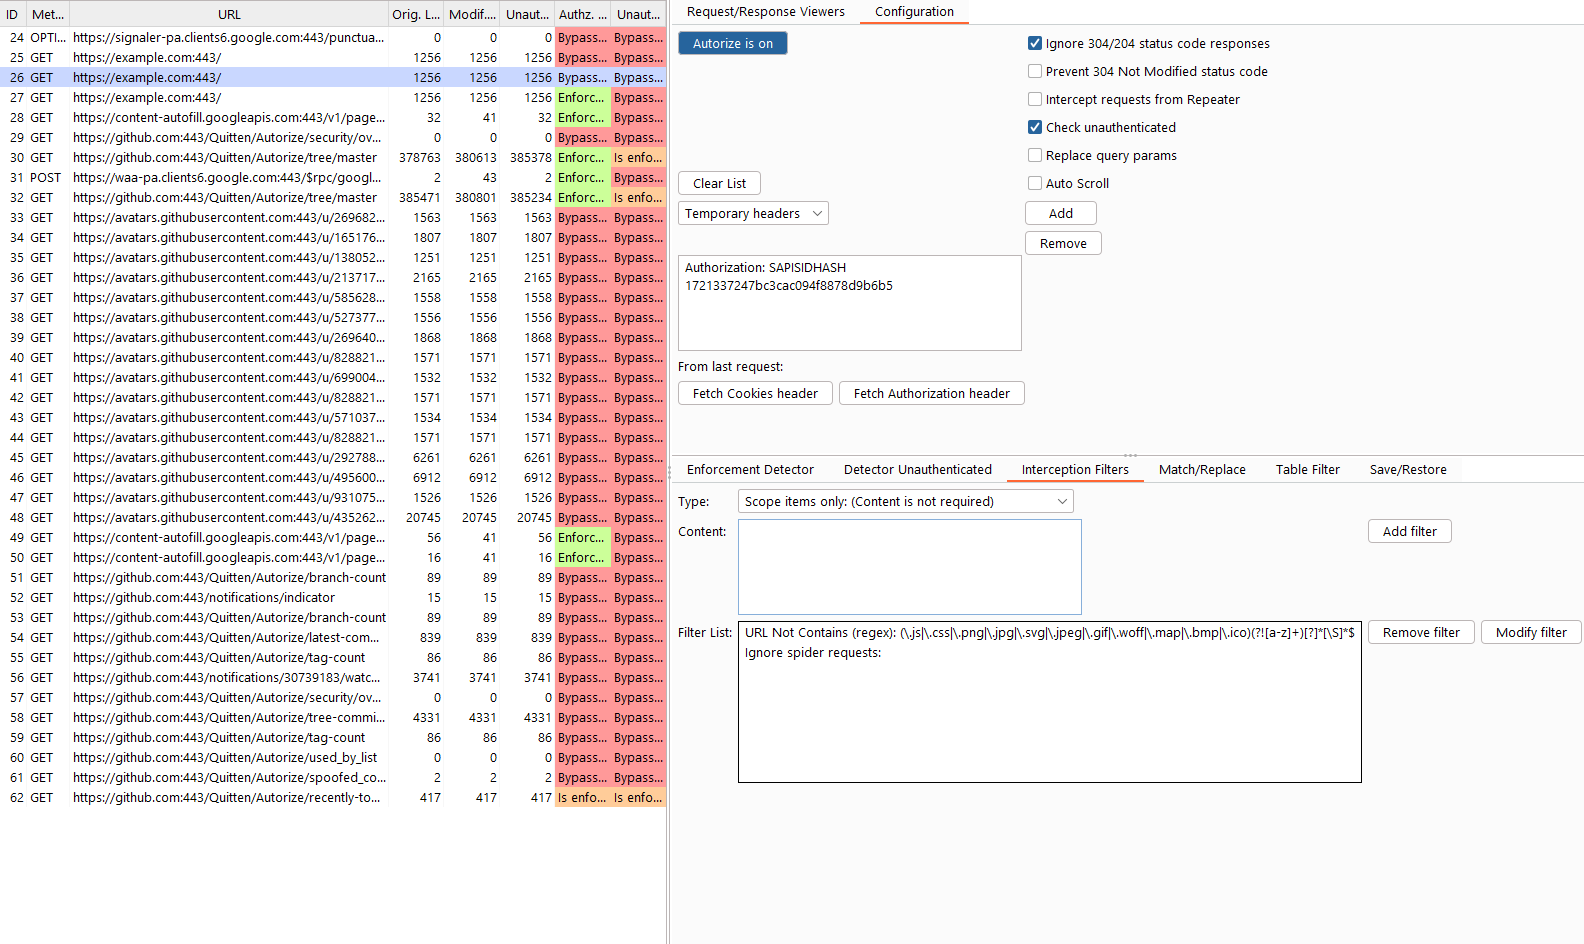
Open the Autorize tab after installation.
-
Navigate to Autorize → Configuration.
-
Insert a low-privileged user authorization header:
- Cookie
- Authorization header (e.g., Bearer token)
Note
Headers defined here will be replaced if already present or added if missing. -
Optional settings:
- Check unauthenticated
- Disable if authentication testing is not required
- Intercept requests from Repeater
- Enables testing of manually crafted requests
- Check unauthenticated
-
Click “Intercept is off” to start interception.
-
Configure your browser to proxy traffic through Burp.
-
Browse the application as a high-privileged user.
-
Observe results in the Autorize table.
-
Select any entry to inspect:
- Original request/response
- Modified (low-privileged) request/response
- Unauthenticated request/response
Autorize assigns one of the following statuses to each tested endpoint:
Authorization or authentication was not enforced.
Access controls were properly enforced.
Autorize could not reliably determine enforcement and requires manual fingerprint configuration.
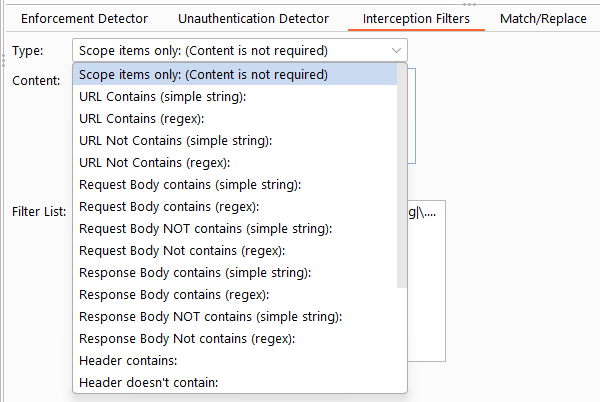
When enforcement cannot be automatically determined, you can configure Enforcement Detectors.
There are two detector categories:
- Low-privileged enforcement
- Unauthenticated enforcement
- Response body content
- Literal string
- Regular expression
- Response headers
- Content length
- Full response inspection
If a modified request returns a response containing:
You are not authorized to perform this action
Add this string (or a regex) as a fingerprint in the enforcement detector. Autorize will then automatically recognize authorization enforcement for similar responses.
Interception filters control which requests are analyzed by Autorize, helping reduce noise and improve performance.
- Burp Scope
- Whitelist
- Blacklist
- Regular expressions
Autorize includes default filters to exclude static assets such as images and scripts.
Example configuration:
Autorize supports multiple low-privileged users simultaneously, allowing you to compare authorization behavior across different roles or sessions.
Each configured user gets a dedicated request/response viewer on the right side of the table. When you select a row, all visible user viewers update automatically with their respective data. This means you can view User 1 and User 2 responses side by side to quickly spot differences in authorization enforcement.
Clicking on a user's column cells (e.g., "User 1 Modif. Len" or "User 1 Authz. Status") will expand that user's viewer to full size for a focused inspection. Clicking the URL column restores all visible viewers for comparison.
The "Request/Response Viewers" tab includes an eye icon button in the tab header. Clicking it opens a popup menu where you can toggle which viewer sections are displayed:
- Per-user viewers (e.g., "User 1 Request/Response", "User 2 Request/Response")
- Original Request/Response
- Unauthenticated Request/Response
This allows you to customize the right panel to show only the comparisons you care about. For example:
- Show only User 1 and Original to compare a low-privileged user against the original response
- Show User 1 and User 2 to compare two different roles
- Hide Unauthenticated if you're only testing authorization, not authentication
The visibility selection dynamically adjusts the panel layout, giving more vertical space to the remaining viewers.
- Autorize relies on response comparison heuristics and fingerprints—false positives or false negatives are possible.
- Complex authorization logic may require manual detector tuning.
Contributions are welcome.
Feel free to open issues, submit pull requests, or suggest improvements.
Barak Tawily
CTO @ Enso Security
Application Security Researcher – https://quitten.github.io/
Former Application Security Consultant @ AppSec Labs